Thursday 27 February 2014

Wheel progress continued

Top view of Richard working
on the wheel
By the end of today,
half the boards are in...

... and the remaining 15 pairs are ready


Wednesday 19 February 2014

Waterwheel rebuild - good progress

Ray planes bucket boards
 A good turnout of 7 volunteers today, so we were able to get on.  Ray, Bob and Donald continued making the bucket boards.  This involves ripping the boards to width, cutting at the required 54 degree angle; trimming them to length; drilling the bevelled edge for the joining screws and inserting and removing the screws (to make them easier to put in for real); and planing the edges to ease the fit into the wheel castings.

We now have 10 sets fully processed, and the remaining 20 sets are all ripped and waiting for length cutting and finishing.
Richard helps Bob locate the angle
of the bucket screws

Assembly has been made easier by drilling the clearance holes slightly bigger than is strictly necessary for the brass woodscrews we are using.


The tailrace is flooded
In spite of which several buckets
were installed

Richard and David managed to complete the installation of 7 buckets overall.  They have to be fitted a few at a time, then the wheel turned and some fitted at the opposite side.  Otherwise the weight of them would make the wheel dangerously unbalanced.

Finally, Peter and George got on with cobbling the area behind the wheelhouse; only a small area left to do.

Friday 14 February 2014

Finally work starts on the wheel

Donald cuts some bucket
bottom boards

At last we were able to start rebuilding the waterwheel.  Using the new saw table to cut the 54 degree angles on the board edges, Bob and Donald produced the pairs of boards for 10 buckets - only 20 to go.  We then trimmed them to length.  The next stage is to fit them together in the jig (see last week) and drill them for the joining screws.  The leading edge of the bucket boards has to be rounded and the edges thinned to fit in the shroud castings.
The centre of this diagram shows how a pair of boards fit together, at an angle of 108 degrees, and meet the lining boards to form a bucket.  The outer part represents the 30 buckets and 40 lining boards forming the wheel.


Richard fits the first
of the new buckets
Richard took the first completed set and did the final trimming to fit it in the wheel.

Tuesday 4 February 2014

Sawing at last

 Richard started the day by releasing a few waterwheel tie-bar nuts that hadn't been done before.  However, the main news was that the saw table had finally arrived.  It was agreed that it was only to be used by volunteers who had been approved by Ray - Bob, Richard and Donald all demonstrated their ability not to sever any limbs!
 The saw was impressively professional looking, and was also a big, heavy object, even though on;ly the table and motor came as a pre-assembled unit.  Eventually it was manhandled up the mill stairs and the boxes were opened. Once we had digested the rather complicated and, in places, vague instructions, it gradually began to take shape...
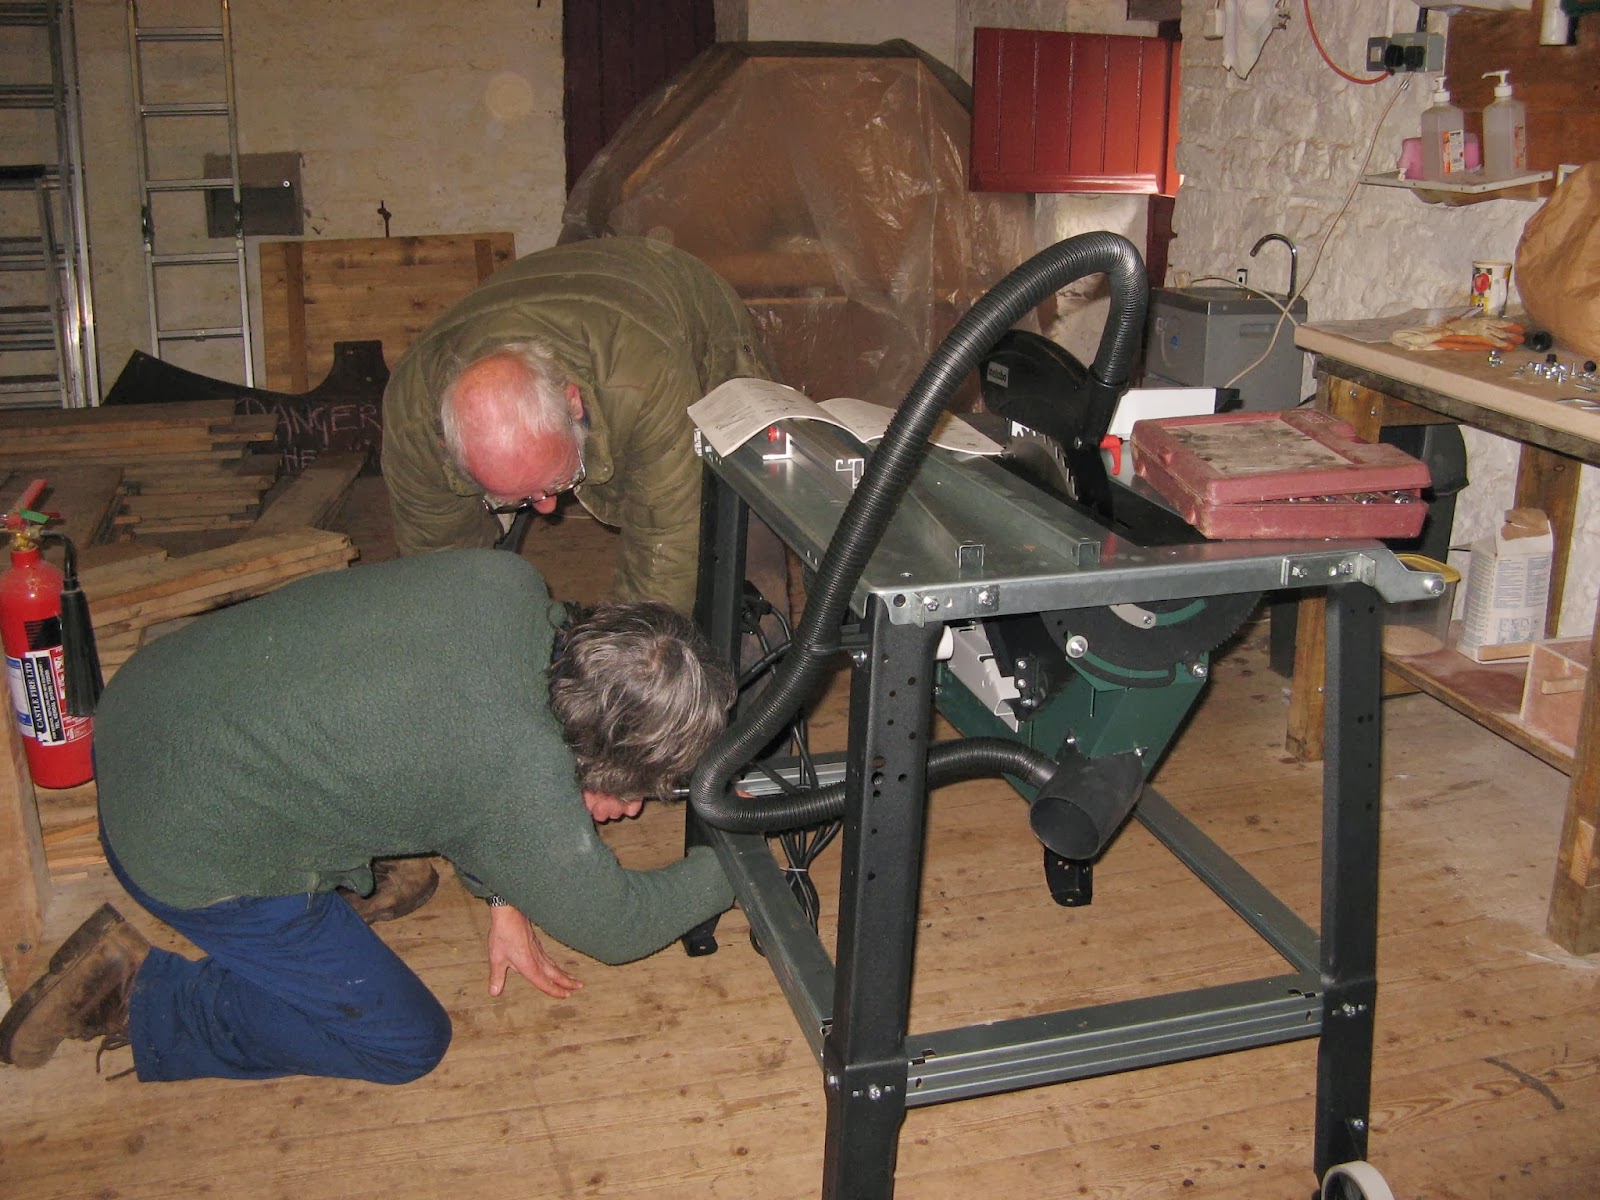
 ...until finally it was standing on its own feet and ready to run.  There were two minor issues, both components that were unduly flimsy for such a heavyweight piece of machinery: the little wheels that allow it to be moved were held on by weak circlips which pinged off whenever strain came on the axle; and the plastic butterfly nut that locks the saw angle control snapped off its metal core on first use.
Other than that, a successful start.  We cut some of the wheel boards to their 54 degree angle and mounted them on the jig Ray had made for their assembly.

Saturday 1 February 2014

Still waiting for the saw table

George repoints the wheel pit
 This week we continued to prepare for re-boarding the wheel, as the saw table still hasn't arrived.  We took the last couple of dozen bucket boards back to the sawmill to be reduced to 25mm thick, and they are now all stored in the relative dry of the mill.

George has been standing at the bottom of the wheel, pointing the back wall of the wheel pit with hydraulic lime mortar, a job that can only be done while the wheel is entirely without boards.

All the bolts holding the wheel shrouds to the spokes have been loosened, and one on each spoke has been replaced by a length of studding, so that the shrouds can be moved apart.  A log, cut to length and with two hooks to enable it to be attached to the spacer bars, will be used with a bottle jack to force the shrouds apart.

Richard attaches a hoist
to the shrouds
The plan is for the shrouds to remain supported by the ends of the spokes, but just in case of mistakes we are attaching a hoist to take the weight.
A general view through the
stripped wheel