Monday 17 November 2014

Experimental Evidence

1                     2                       3
We know that breadmaking machines are not very good at making bread from the relatively low gluten flours that are made from British wheat.  For anyone who is uncertain about the properties of various flours and how they behave in a breadmaker, Philip Day from Leeds has carried out an experiment under controlled conditions.  He writes "to demonstrate the differences, I've baked three loaves using the Panasonic standard 'Wholemeal loaf' using 350 grams of flour in each case. Flours used are

  1. Acorn Bank stoneground wholemeal
  2. Waitrose Very Strong Canadian Stoneground Wholemeal [Spring Red Wheat]. 
  3. Carrs Strong White and Strong Brown [not wholemeal], roller-milled mixed 50/50."

If you want to bake using our flour, the recipe published by Little Salkeld Watermill certainly worked well when I went on one of their breadmaking courses.  Alternatively, I find a 50:50 mix with Allinson's Very Strong white or wholemeal works well in the breadmaker.


Meanwhile, back at the mill, Richard and I finished installing the dummy shaft and pulley in the former sawbench area.  These pictures show the inside and outside ends and their replica bearings.

Wednesday 5 November 2014

End of the season - or not?


The property closed on Sunday - but will still be open until 28 December at weekends!  That leaves us having to decide when to open and mill. Much of yesterday was taken up with a meeting to plan the work programme for the winter.  It seems that there is a lack of building surveyors in the Trust, which is holding up a number of projects, including our kiln.

 Work has continued on making the dummy shaft to fit the bearing box in the lower wall.  Ray has made two imitation wooden bearings, shown here carrying a surplus length of shafting, and these have been drilled to suit the holes in the original box.


This week Richard, Donald and I managed to hoist the shaft into position, where it sits on the beam and the bearing box. Now we just need to fit the dummy bearings and make a gear wheel for the outside.
We received our second delivery of grain at the end of October.  Ray, Donald and I  loaded it into the mill, half in the old grain bin and half in the new one in the information room - seen here both part full and locked up, as it will normally be.  The delivery was short of a tonne, but no problem as we won't need it all this season.


Meanwhile work continues on the mill yard.  This week all the garden and estate staff and volunteers turned out to clear it and put down gravel for an apple-pressing event this coming Saturday (with help from George and Peter).  They also managed to break one of our stone lintels while trying to move it into the kiln room.


Wednesday 1 October 2014

Sizergh Greenwood Fair, grain storage etc.

Our stall at Sizergh
Last Saturday, Sylvia, Richard and Bob ran an Acorn Bank stall at the Sizergh Greenwood Fair.  We assembled a fair display from the unpromising ingredients of Richards wallpapering table, two corkboards the Sizergh staff found, some pictures, bags of flour and some string to stop the boards from blowing over.  We had a good day, selling 25 bags of flour and advertising the virtues of Acorn Bank and, particularly, Apple Day.
Building the new bin

Meanwhile on Tuesday work continued on the new rodent-proof aluminium-lined grain bin.  This one is to have a hinged lid so it can easily be padlocked, as it will have to live in the Information Room.  Otherwise it is being built on much the same lines as the old one.

The need for the new bin is due to the change in our grain supply - instead of buying 150 kg at a time from Little Salkeld watermill, we are now buying 1 tonne at a time direct from the farm.  The old bin was not designed for that quantity, either in volume, or in the strength of its castors.

Fitting extra castors
As a new delivery is imminent, and our grain stocks are very low, we took the opportunity to empty the old bin and add 4 more castors to it to cope with the extra weight.

The driest September since records began has left us desperately short of water, and an average day's milling has gone from about 22 1.5 kg bags to 7 or 8.  It is therefore even more essential to keep the headrace clear.  It was obvious that there were several places where fallen twigs and branches were slowing the flow, so we took the clearing tools and removed as much as we could.

Clearing the leat - just look at
the "dam" behind Richard


While others were continuing with clearing the yard for cobbling, we also looked at the bearing support where the drive from the third waterwheel originally entered the building.  Having removed the masonry that had been inserted to block the space, we treated the metal with Waxoyl and put a wooden back in the hole to keep weather and wildlife out.  Ray is going to make some wooden imitation bearings to support the layshaft with its two pulleys.


Fitting a board to the
bearing support


Tuesday 26 August 2014

Moving the chicken hut and other stories

In order for the cobbling of the yard to proceed, we had to move the chicken shed from the top of the yard to the bottom.  Having pleaded a bad back, I was able to take pictures from the upstairs of the mill while Chris (the gardener), assisted by the mill and estate volunteers, used a system of planks and rollers to move the beast into its new position.  It seemed to be surprisingly heavy, even though all the chickens had been removed first!

The removal of the shed meant we could get at the old lay-shaft that had been trapped behind it.  This was not part of the mill machinery, but had been introduced.  Richard had an idea that we could use it to give a better idea of the mechanical arrangements in the saw-mill part of the mill.  To that end, he has started to dismantle it and shorten the shaft.  It is proposed to make dummy wooden bearings and a dummy gear wheel to sit on the outside end, where it would have met the gearing from the third waterwheel.
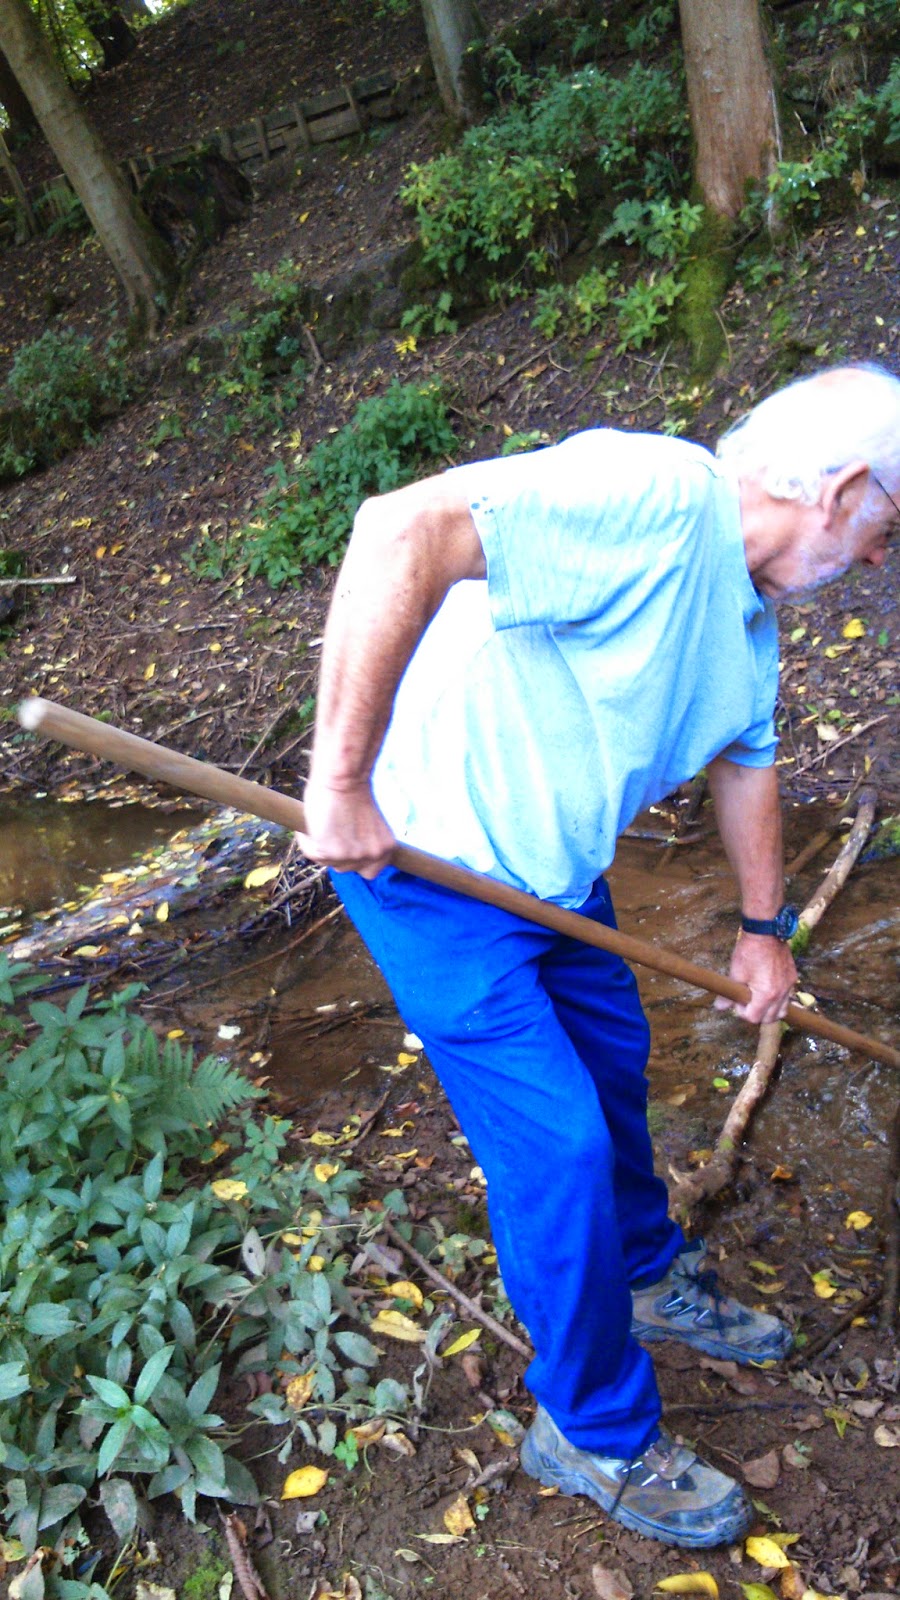
Where I crossed the river

The evidence we have for the third wheel and its drive comes from some late 19th century photographs.  So that we could get a better idea of the arrangements, I decided to take a modern picture from a similar viewpoint.  This means the other side of Crowdundle Beck.  I first tried walking to it via the road, but after a 35 minute exploration, I decided I could not reach the river bank that way.  Later I set off to ford the river, armed only with a crudely cut stick and a pair of borrowed wellies.  This was more successful, though the trees and undergrowth have advanced a lot since the 1890s.


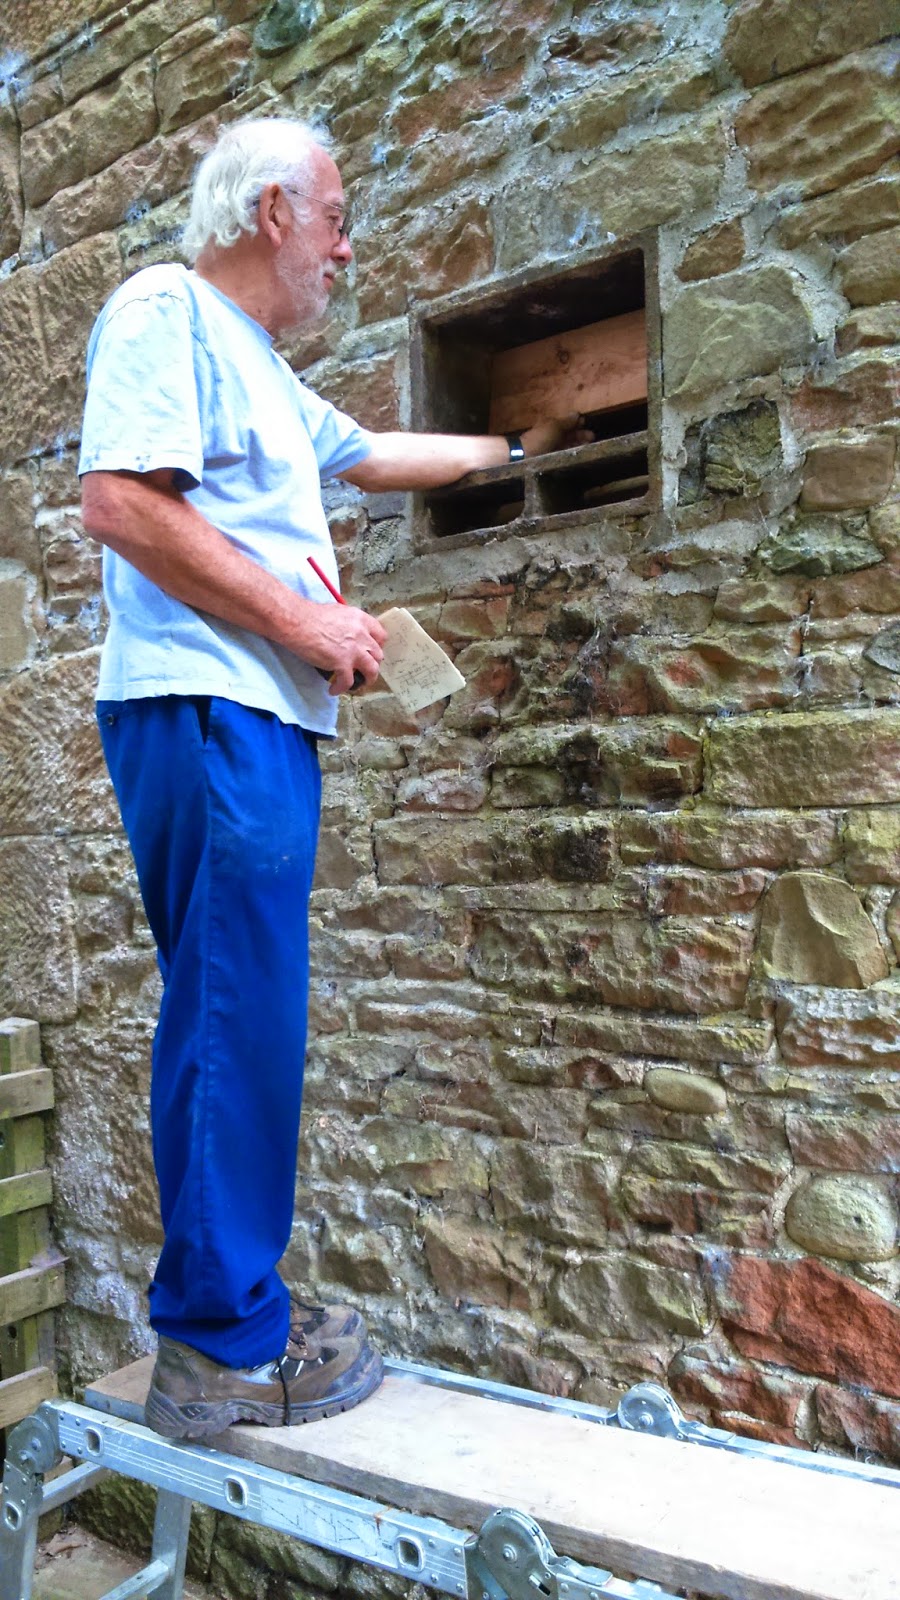
I got the angle about right - this is a combination
of the 2 pictures

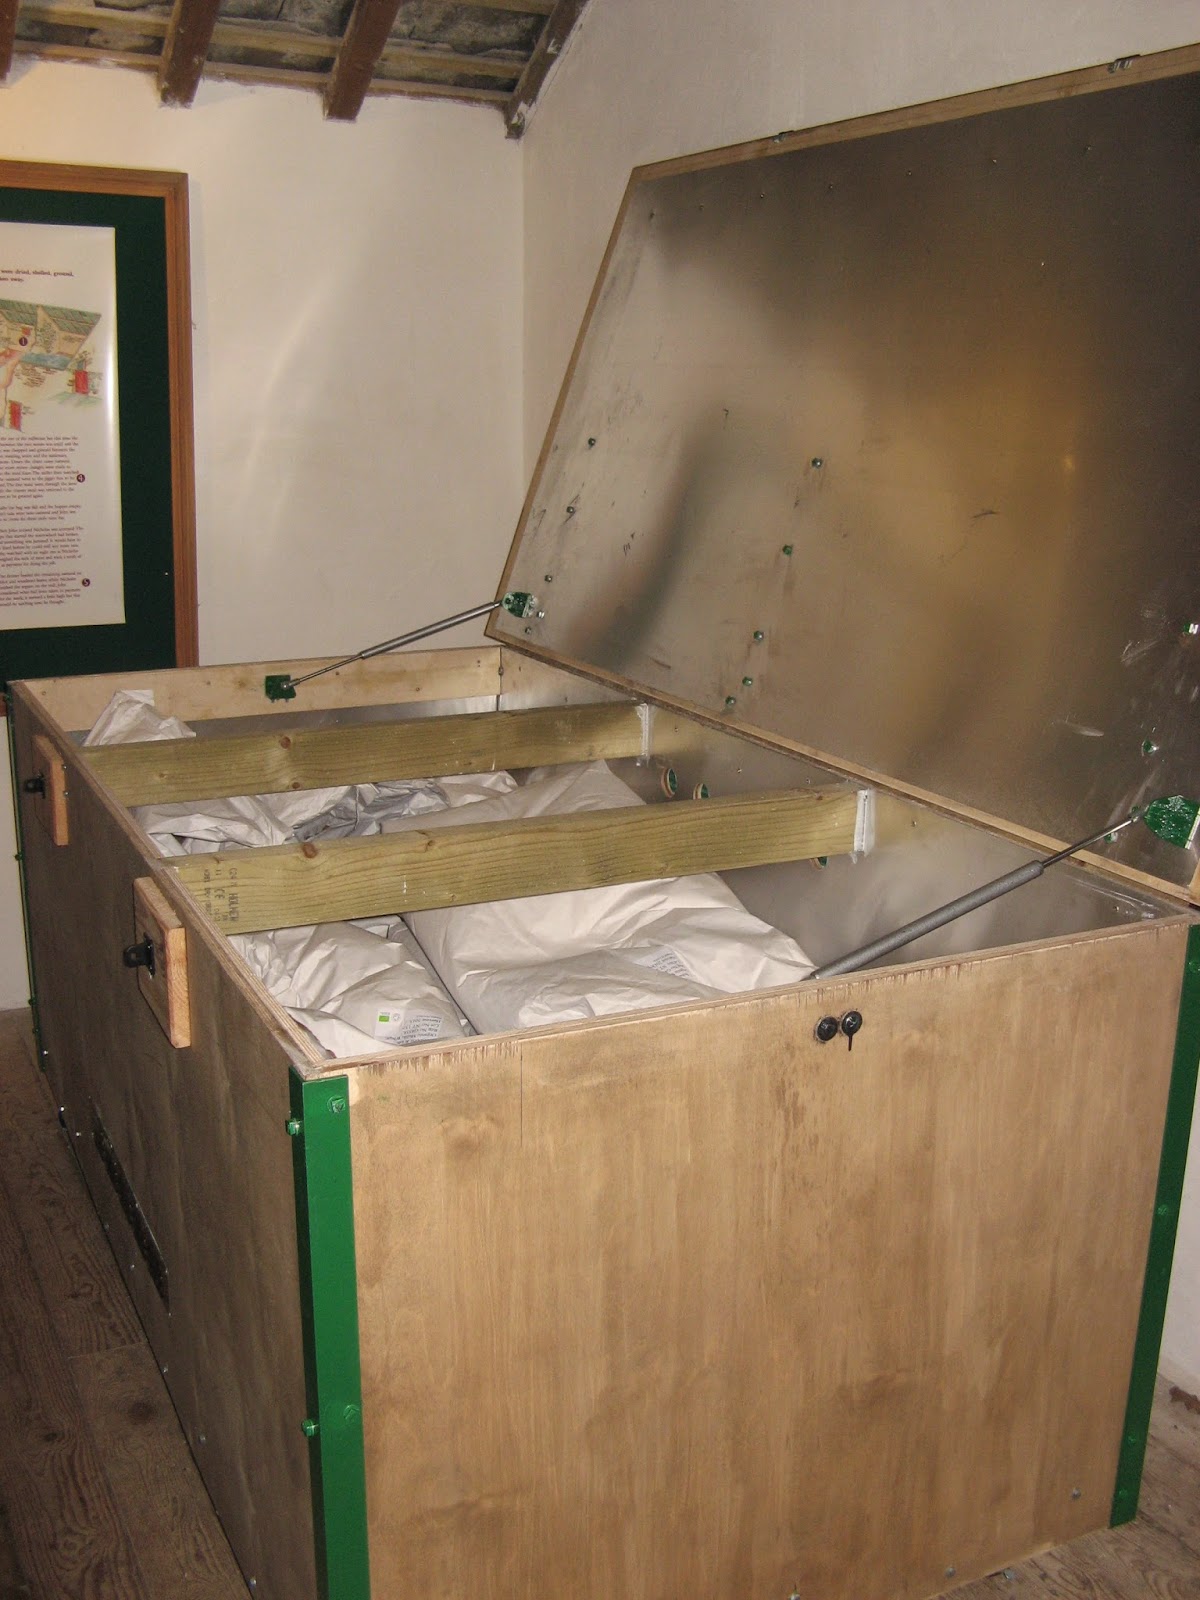
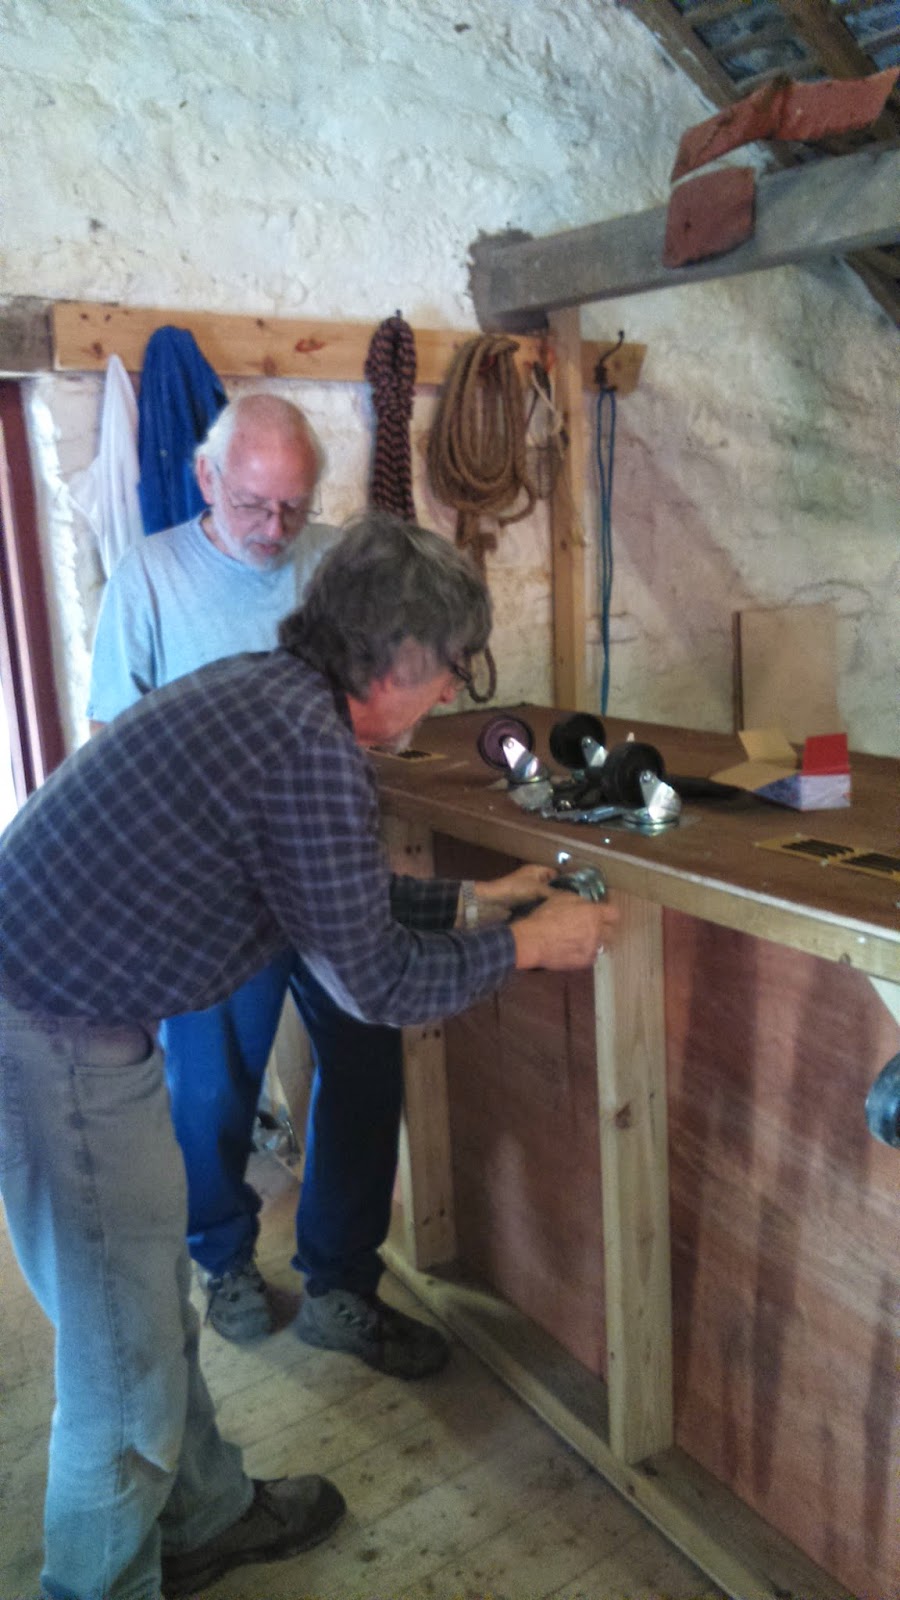
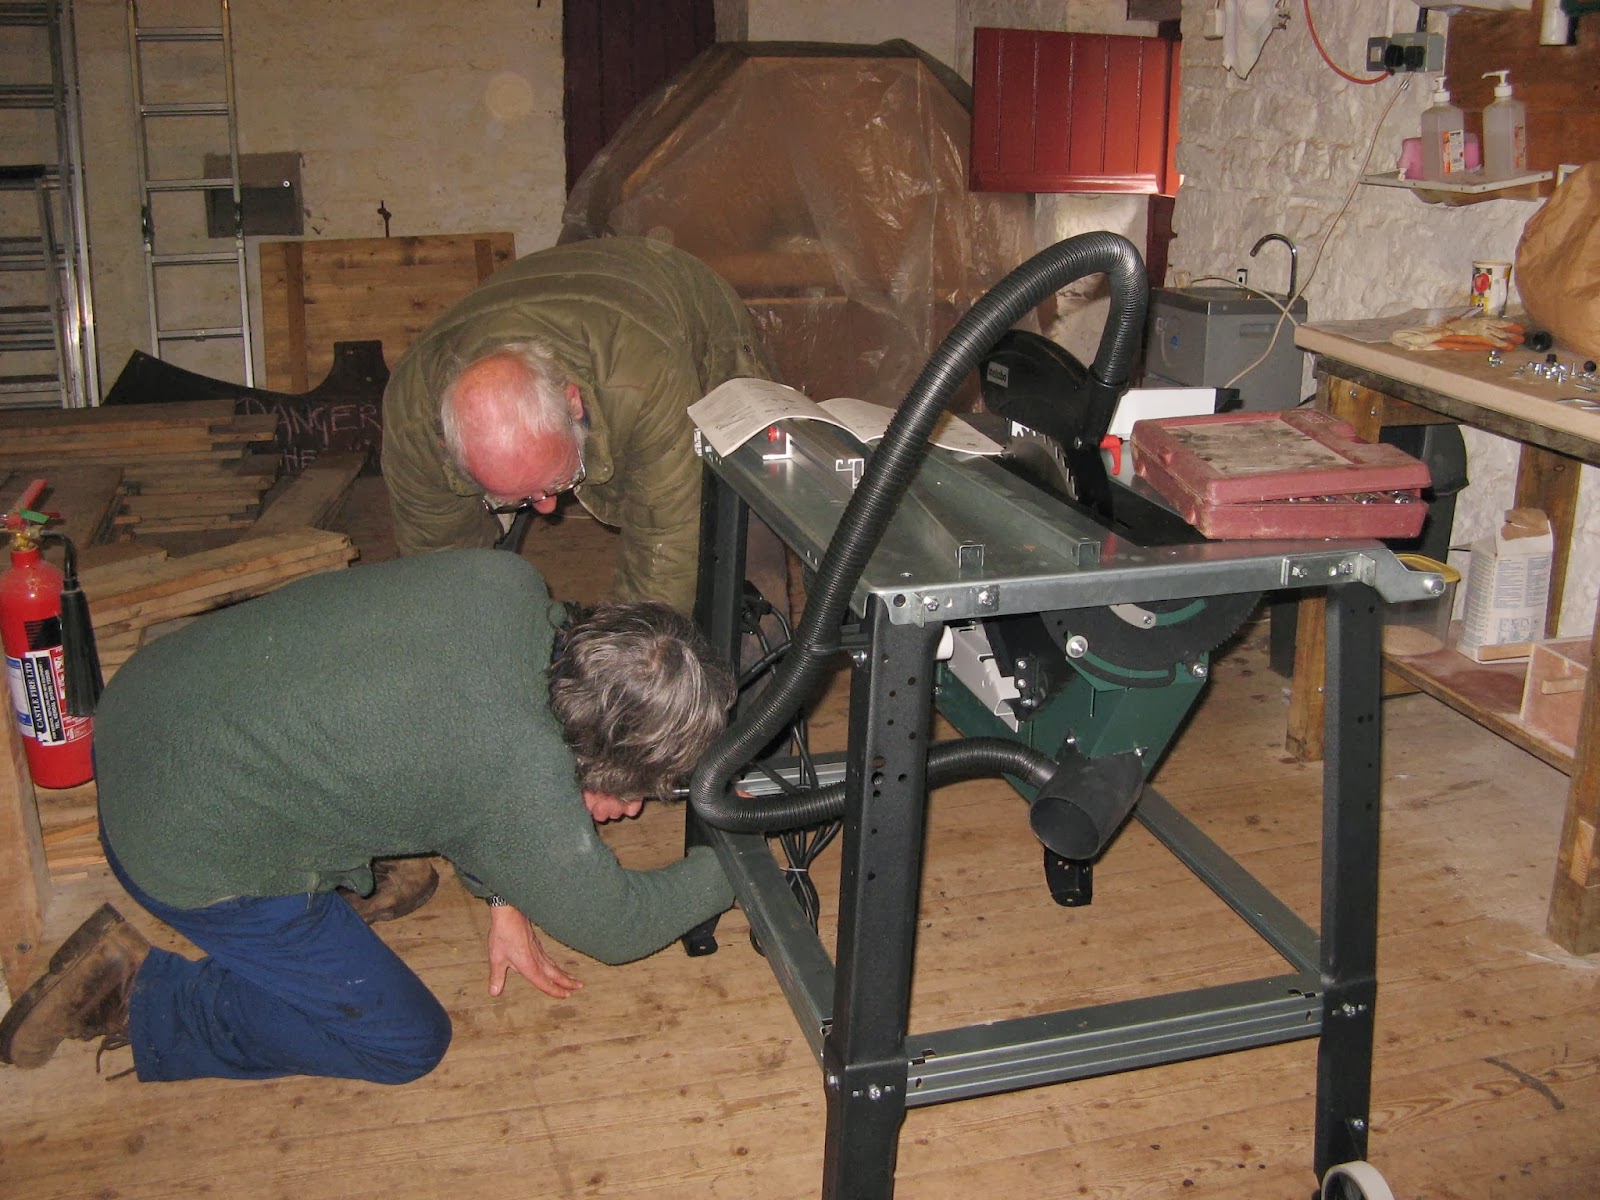
In other news, the timber and castors have arrived for the second grain storage bin, so Ray and Donald started work on that.


Wednesday 20 August 2014

We'll always find another job to do...

...in fact, we'll find any number of jobs.

Just recently we have:

Made changes to the milling machinery to reduce the chances of annoying wildlife, like mill moths, gaining access.  This includes taking the damsel out every time we finish milling and storing it in the hopper.  To facilitate this, we have changed the mounting of the upper bearing of the damsel shaft.

Continued cobbling the yard.

Made plans for a second grain bin and got the materials ordered.

Made no progress with the rebuilding of the kiln.

Begun to rebuild the retaining wall adjacent to the weir.  The river has undercut the wall (as it has the weir itself) and there was a danger the whole thing could collapse into the water.  The pictures show Richard and Donald moving some heavy masonry during week 2 of the work (I was there as well, but I was holding the camera!).


Nice day for a change!

Tuesday 10 June 2014

Even more wheel power

Quite a lot has happened.  Nick and Ana Jones have finally sold Little Salkeld watermill and are due to enter well-earned retirement (!) next week.  As a consequence, we are unable to buy our wheat from them as we have done since we started milling.  However, Nick very helpfully found a supply of good quality wheat for us, and we had our first tonne delivered a couple of weeks ago.  I would like to thank Nick and Ana for all the help they have given us over the past few years, and to wish them all success in whatever they turn their hands to in the future.


A couple of weeks ago, I visited the National Trusts's Cragside.  I was interested to see that their model of a pitchback wheel had a simple step at the end of the launder to kick the water flow upwards.  This avoids the impulse of the water from opposing the motion of the wheel.  Our wheel has been highly efficient since we re-boarded it, but there is never any harm in increasing efficiency - after all, we might have a dry season and be short of water.

With this in mind, Richard added an extra baffle board to the end of the launder to achieve a similar effect. When we tried it out, the wheel turned (not under milling load) with much less water than ever before.
 We have also built part of a tun over the shelling stone, with a plastic window at the front.  This is partly to improve the safety of the mill operators while the machinery is turning, and partly to show visitors what is going on in the milling tun.

The newly efficient wheel has enabled us to turn out much more flour than before in a standard weekend session, and we now have a good stock in the mill and the shop.

Other jobs have included cleaning out the tun and flour chute and improving their resistance to intrusion by mice and insects and continuing to expand the cobbled area - George is now working across the front of the barn.

Tuesday 22 April 2014

A good start to the milling season

Having only started milling for the year on April 12th, we were keen to try out the new power of the wheel.  We started with eight 25 kg bags (200kg) of wheat, and Richard and I milled 75kg in that first weekend, roughly shared between his Saturday session and my Sunday one.

That left just 5 bags to last the 4 day Easter weekend.  We divided it quite fairly, so we each had 1¼ bags per day.  With the new, improved wheel that was NOT ENOUGH! On Monday I ended up milling talcum-powder fine just to try to slow the machine down so we could last until 4 o'clock.

We had hundreds of visitors over the weekend (230 Sunday, 255 Monday) and sold most of the flour we produced, though we did eventually run out of labels.  We need to pay more attention to stock control at the start of future seasons.

During the first two weeks in April Richard and I gave our talk on the restoration of the mill (wittily titled "Flour Power") to two more local history groups, in Bampton and Low Hesketh.

Some Dutch windmills

 During a short holiday in Holland, we visited the Zaanse Schaans museum, where there is an amazing number of working windmills.


 Some are sawmills, one crushes peanuts for oil, one grinds spices and the one whose works are shown below grinds pigment.  We didn't see or hear of any grain mills.

 Very impressed with the wooden gearing and the general ambiance of having so much machinery turning in the breeze.

Tuesday 1 April 2014

Finishing off and Spring Cleaning

The last board is hammered in
 Over the last 3 weeks we have finished the wheel boarding.  Ray cut and finished the final section of larch liner board at home, and we hammered it into place.  There were then just the bolts holding the paddles in place; these were fitted, trimmed to length and given a dab of black paint so they don't shine too brightly!

The cobbling complete
The cobbling team have finished the area behind the wheel house and are looking for fresh challenges.

Finally, today, we tried letting some water into the wheel for the first time.  It was a great success - see the video below.

Today's main other job was starting to clean and tidy the mill, sweeping, hoovering and mopping the floor ready for reassembling the stone and its furniture and starting to mill in about 10 days time.   The wheat is already on order.

Tuesday 11 March 2014

Wheel work goes on

The stack of liner boards
ready for fitting
Over the past couple of weeks some of the volunteers have worked an extra day.  As a result, the bucket boards are complete and more than half of the wheel liner boards have been fitted  (there are actually 48 of them, not 40 as previously stated).
They are made from larch tongue-and-groove (t&g) board, and are initially prepared by cutting them all to the same length.


One of the liner boards being
persuaded in to place
They are then offered up to the wheel and marked for the bolts that hold them to the casting and for the three brass screws that fix them to the bucket bottom boards.  After drilling they get an application of Roofer's Mate sealant on the mating surfaces before being fixed in place.
Ray cuts a board to fit round a spoke
The boards that coincide with the spokes are a little more complicated.  They have to be cut to fit round the spoke and the casting that it fits into.  They cannot be fitted in the normal sequence, as the t&g would prevent their being put in their place.
Fitting a board trimmed around a spoke
Instead, the previous board is removed, the trimmed board fitted, and the previous board hammered in from the end.

Thursday 27 February 2014

Wheel progress continued

Top view of Richard working
on the wheel
By the end of today,
half the boards are in...

... and the remaining 15 pairs are ready


Wednesday 19 February 2014

Waterwheel rebuild - good progress

Ray planes bucket boards
 A good turnout of 7 volunteers today, so we were able to get on.  Ray, Bob and Donald continued making the bucket boards.  This involves ripping the boards to width, cutting at the required 54 degree angle; trimming them to length; drilling the bevelled edge for the joining screws and inserting and removing the screws (to make them easier to put in for real); and planing the edges to ease the fit into the wheel castings.

We now have 10 sets fully processed, and the remaining 20 sets are all ripped and waiting for length cutting and finishing.
Richard helps Bob locate the angle
of the bucket screws

Assembly has been made easier by drilling the clearance holes slightly bigger than is strictly necessary for the brass woodscrews we are using.


The tailrace is flooded
In spite of which several buckets
were installed

Richard and David managed to complete the installation of 7 buckets overall.  They have to be fitted a few at a time, then the wheel turned and some fitted at the opposite side.  Otherwise the weight of them would make the wheel dangerously unbalanced.

Finally, Peter and George got on with cobbling the area behind the wheelhouse; only a small area left to do.

Friday 14 February 2014

Finally work starts on the wheel

Donald cuts some bucket
bottom boards

At last we were able to start rebuilding the waterwheel.  Using the new saw table to cut the 54 degree angles on the board edges, Bob and Donald produced the pairs of boards for 10 buckets - only 20 to go.  We then trimmed them to length.  The next stage is to fit them together in the jig (see last week) and drill them for the joining screws.  The leading edge of the bucket boards has to be rounded and the edges thinned to fit in the shroud castings.
The centre of this diagram shows how a pair of boards fit together, at an angle of 108 degrees, and meet the lining boards to form a bucket.  The outer part represents the 30 buckets and 40 lining boards forming the wheel.


Richard fits the first
of the new buckets
Richard took the first completed set and did the final trimming to fit it in the wheel.

Tuesday 4 February 2014

Sawing at last

 Richard started the day by releasing a few waterwheel tie-bar nuts that hadn't been done before.  However, the main news was that the saw table had finally arrived.  It was agreed that it was only to be used by volunteers who had been approved by Ray - Bob, Richard and Donald all demonstrated their ability not to sever any limbs!
 The saw was impressively professional looking, and was also a big, heavy object, even though on;ly the table and motor came as a pre-assembled unit.  Eventually it was manhandled up the mill stairs and the boxes were opened. Once we had digested the rather complicated and, in places, vague instructions, it gradually began to take shape...
 ...until finally it was standing on its own feet and ready to run.  There were two minor issues, both components that were unduly flimsy for such a heavyweight piece of machinery: the little wheels that allow it to be moved were held on by weak circlips which pinged off whenever strain came on the axle; and the plastic butterfly nut that locks the saw angle control snapped off its metal core on first use.
Other than that, a successful start.  We cut some of the wheel boards to their 54 degree angle and mounted them on the jig Ray had made for their assembly.

Saturday 1 February 2014

Still waiting for the saw table

George repoints the wheel pit
 This week we continued to prepare for re-boarding the wheel, as the saw table still hasn't arrived.  We took the last couple of dozen bucket boards back to the sawmill to be reduced to 25mm thick, and they are now all stored in the relative dry of the mill.

George has been standing at the bottom of the wheel, pointing the back wall of the wheel pit with hydraulic lime mortar, a job that can only be done while the wheel is entirely without boards.

All the bolts holding the wheel shrouds to the spokes have been loosened, and one on each spoke has been replaced by a length of studding, so that the shrouds can be moved apart.  A log, cut to length and with two hooks to enable it to be attached to the spacer bars, will be used with a bottle jack to force the shrouds apart.

Richard attaches a hoist
to the shrouds
The plan is for the shrouds to remain supported by the ends of the spokes, but just in case of mistakes we are attaching a hoist to take the weight.
A general view through the
stripped wheel